Years ago, I fell in love with using Google Slides for interactive activities. Having a worksheet alternative with moveable pieces changed the way I teach. Google Slides provides meaningful practice that’s not boring. The only problem was that I couldn’t think of an easy way to grade the assignments and give feedback to my students.
Do you have a wonderful Google Slides activity for your students, but you’re not sure how to grade it? Many people have asked me about how Google Slides are graded and I figured others had the same question. Here are some of my tried and true tips for making grading Google Slides easy.
Why Use Google Slides?
Personally, I love assigning digital activities in Google Slides, but you may be wondering what makes it worth the fuss of grading when there are several other self-grading digital platforms out there. When working in edit mode, Google Slides allows students to manipulate moveable pieces. This opens up so many possibilities and makes Google Slides a wonderful worksheet alternative. Plus, it’s free! You can read more about using Google Slides with your students in this post. If you don’t have time to make your own Google Slides activities, you can find some in my TpT store.
Tips for Grading Google Slides
I have yet to find another platform as adaptable as Google Slides, but you pay for this adaptability by having to grade everything yourself. This is the method that works best for me:
Scan the Thumbnails
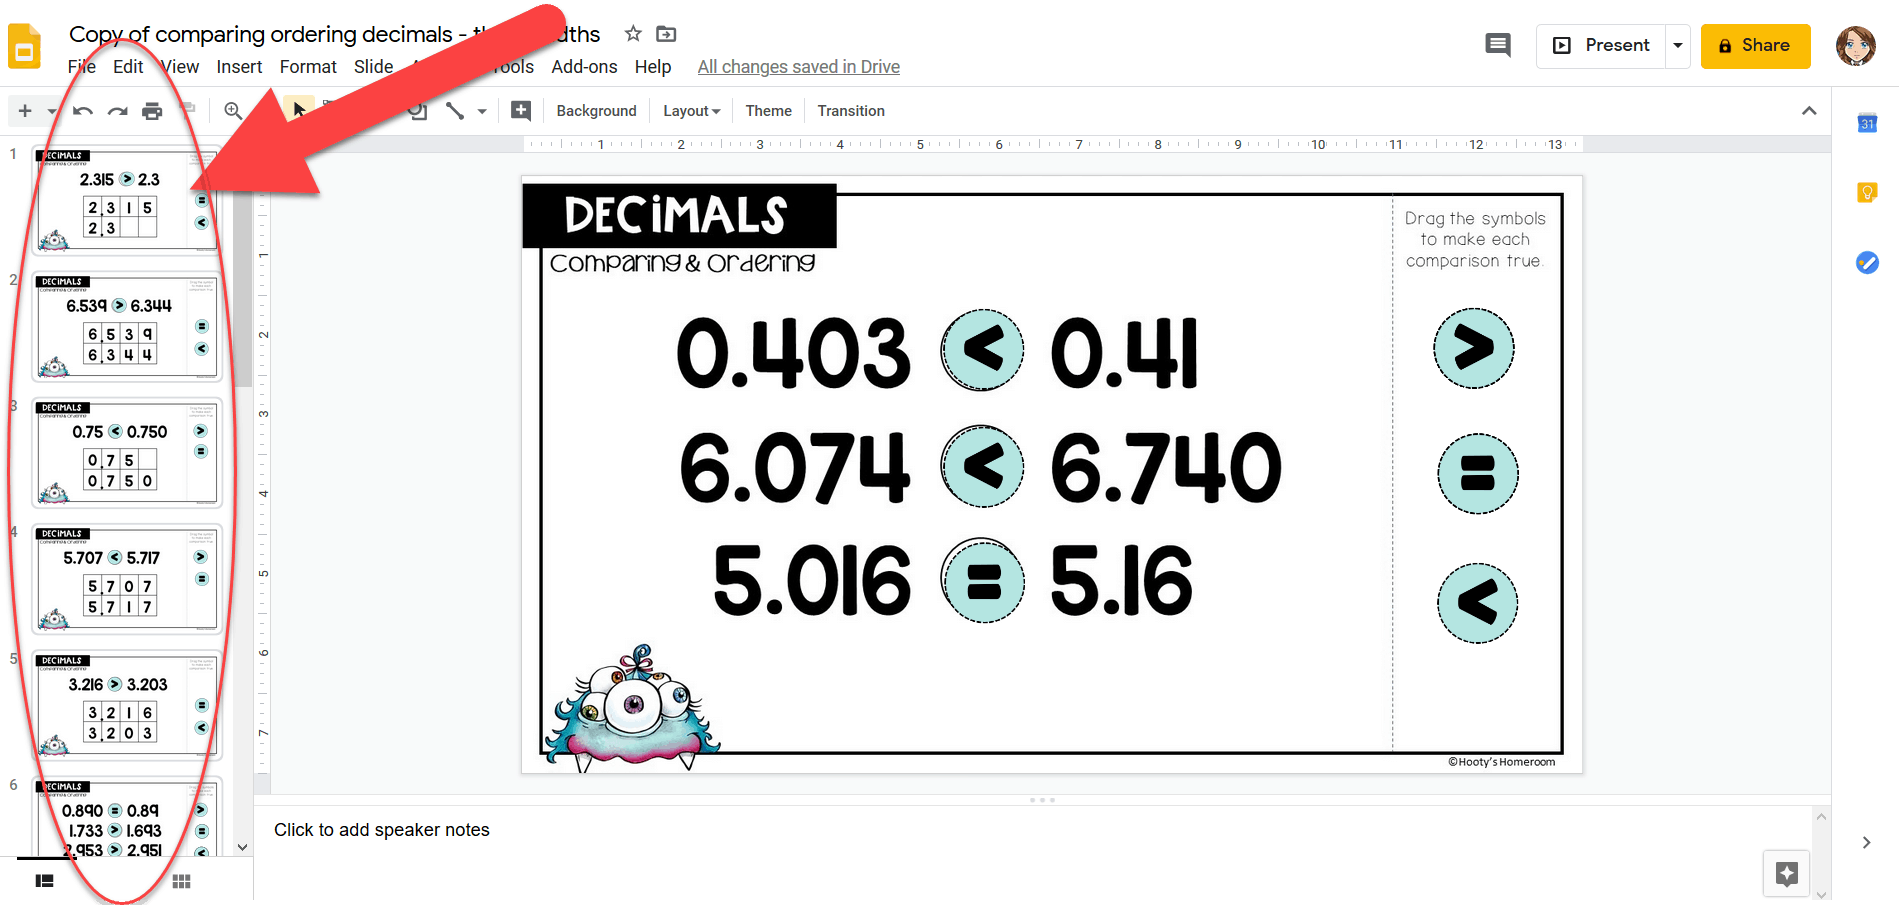
Instead of clicking on every slide in a student’s assignment, I preview the slide thumbnails on the left when possible. From here, you should be able to tell if an answer is correct.
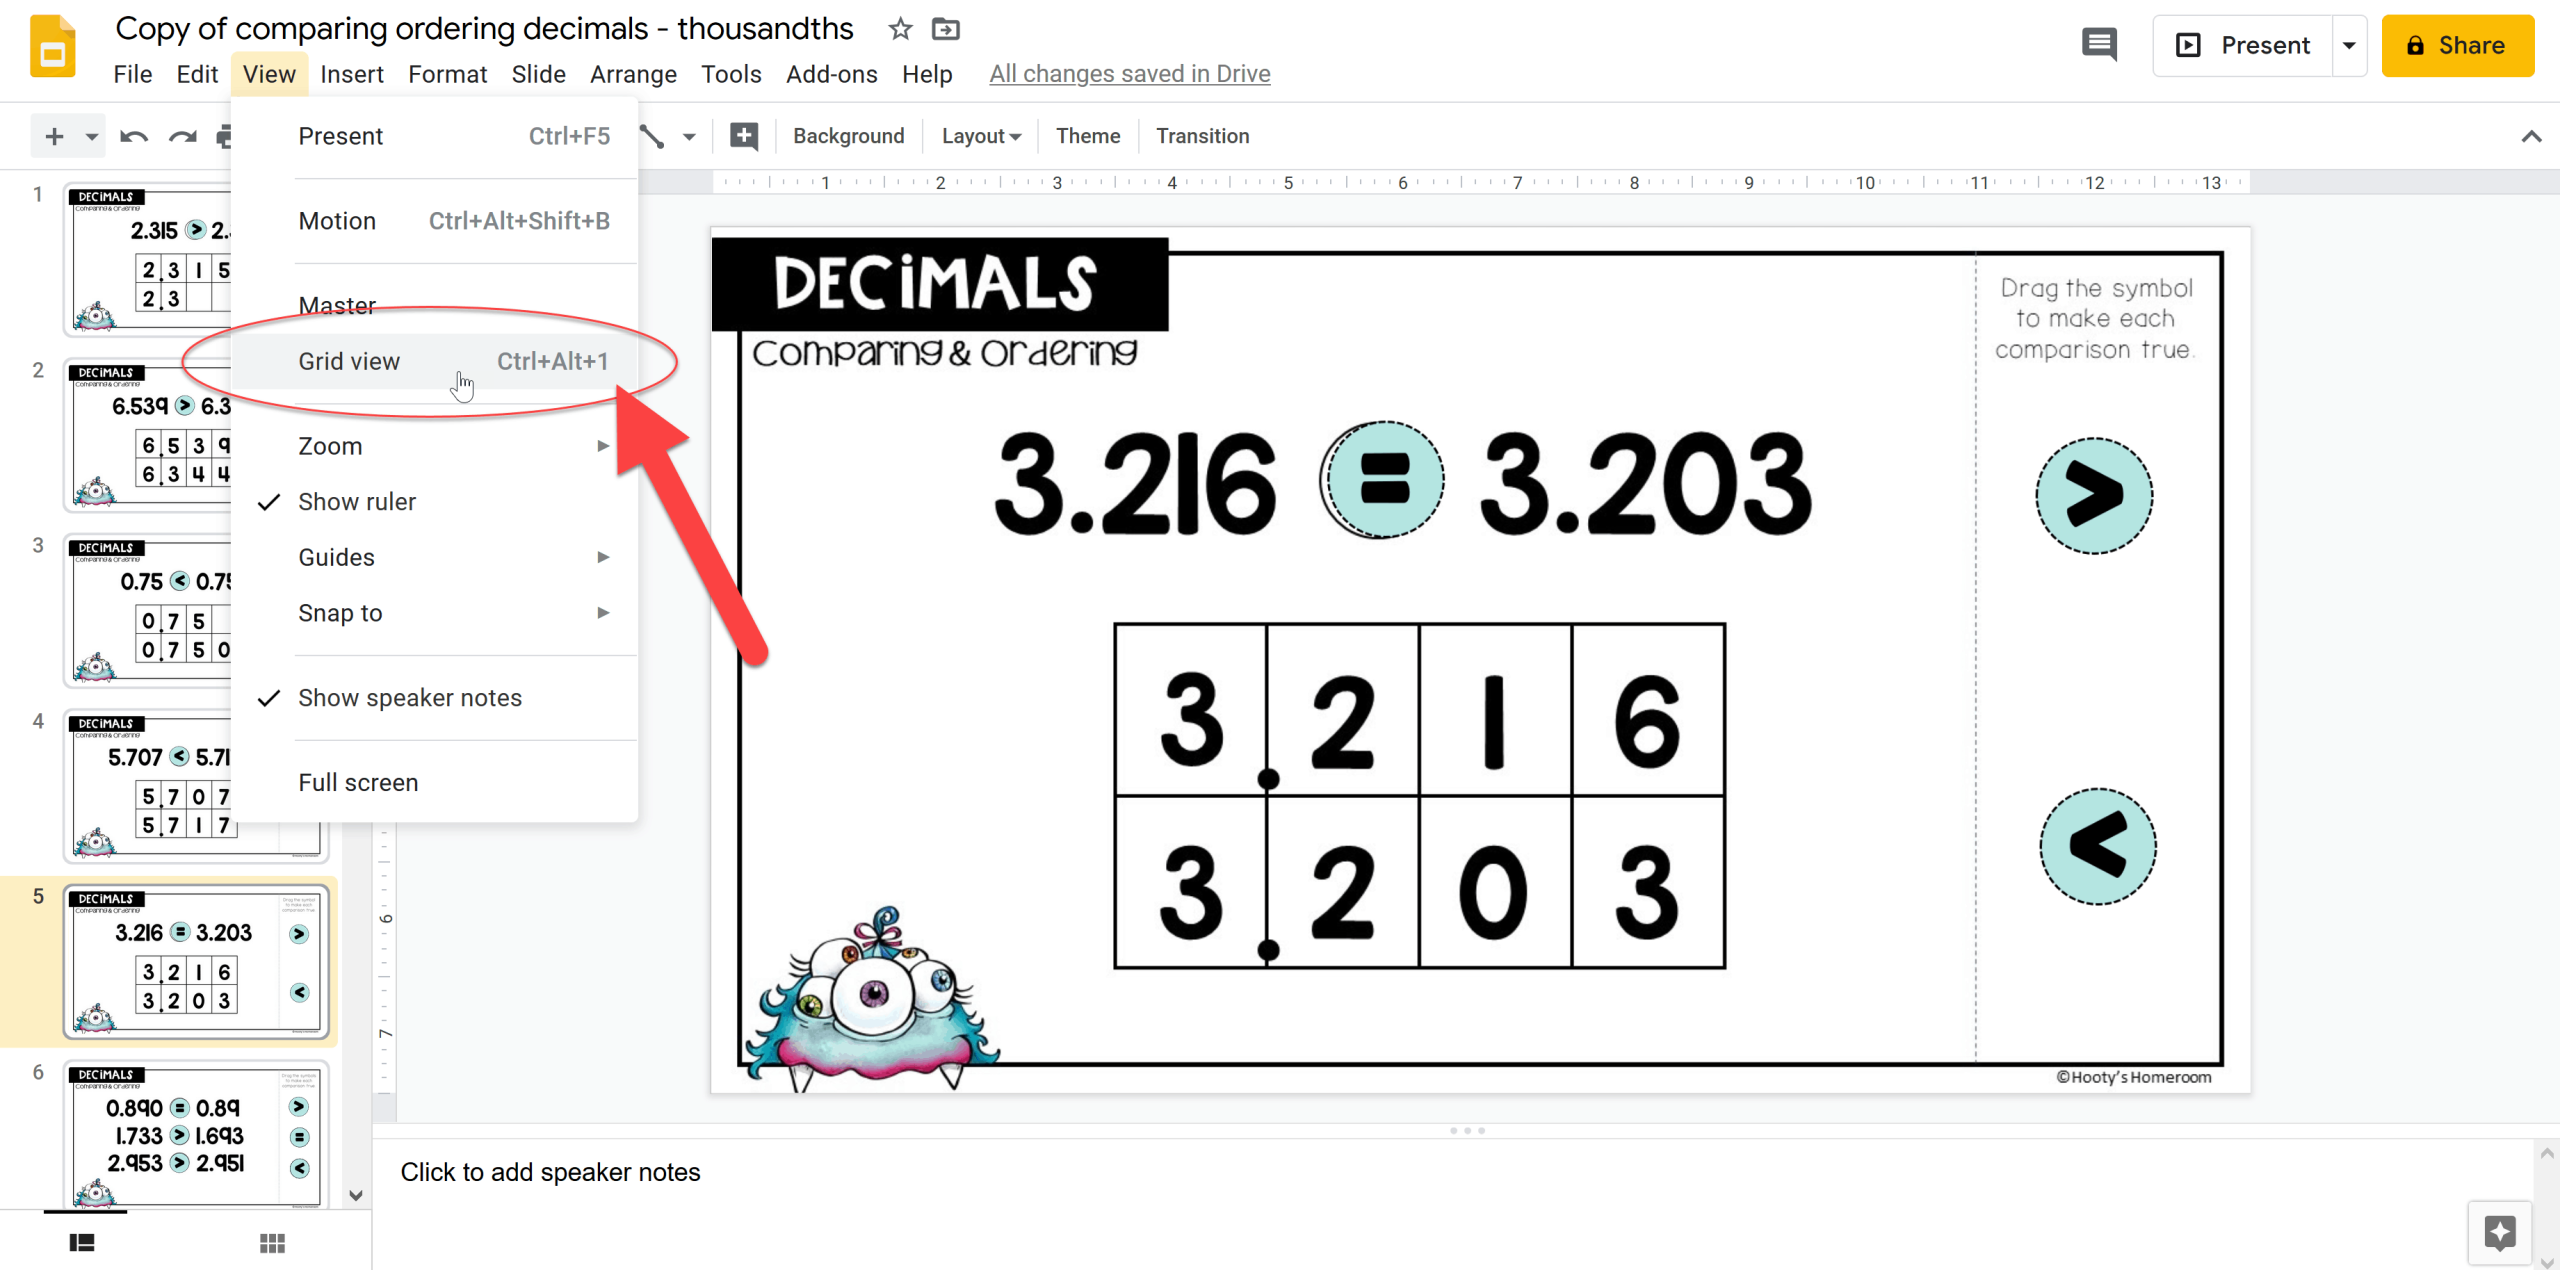
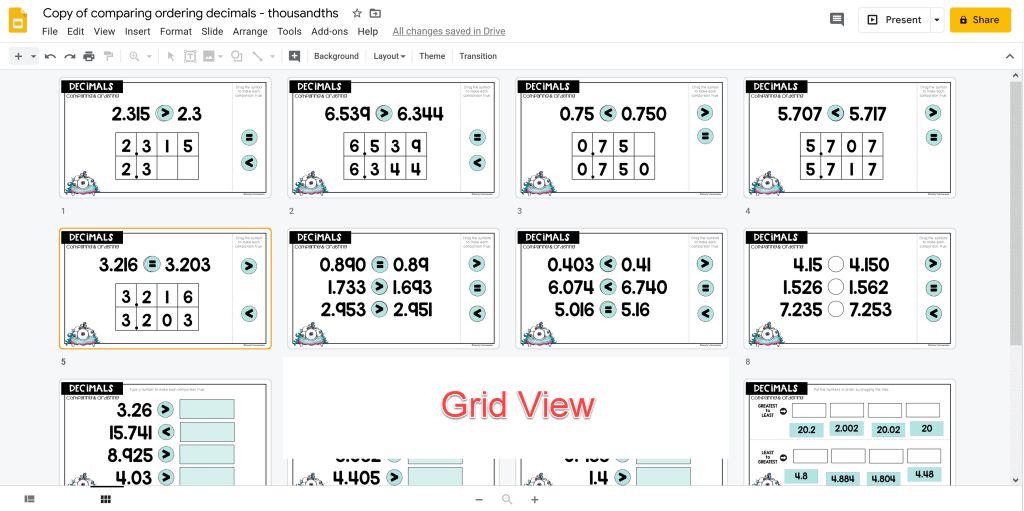
Another way to scan multiple slides at once is to view the activity in grid view. This saves me a lot of time! If I can tell that an answer is wrong, then I will click on the slide to get a closer look.
Mark Incorrect Answers
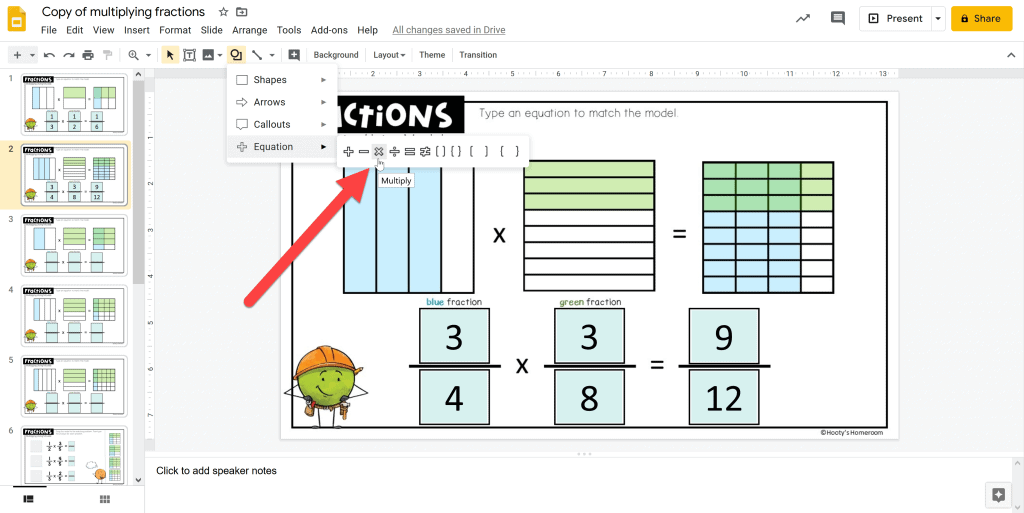
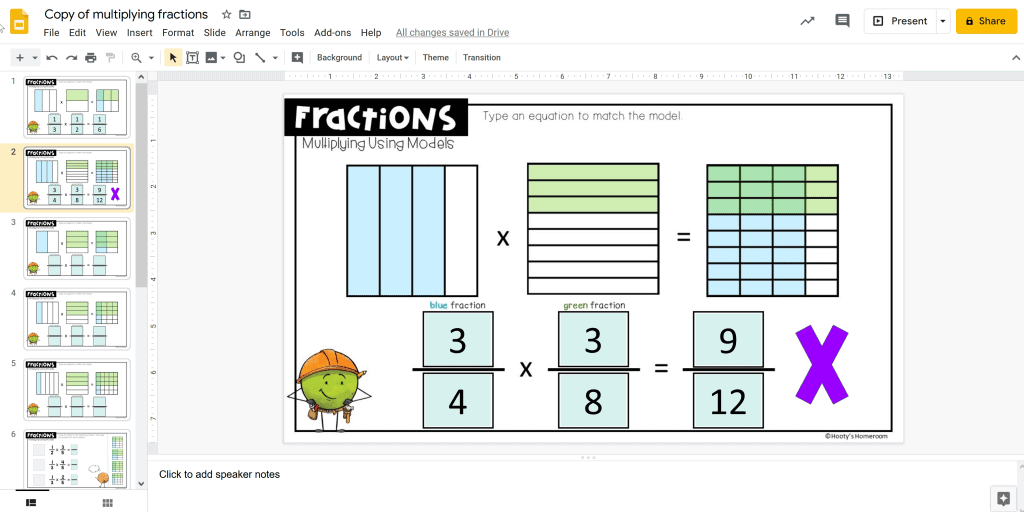
There are different ways to let a student know that an answer is incorrect. I usually draw an “X” with the shape tool somewhere on the slide. After drawing the “X”, I copy it to my clipboard to use later if I need it. This allows students to see what they missed at a glance.
Leave Comments
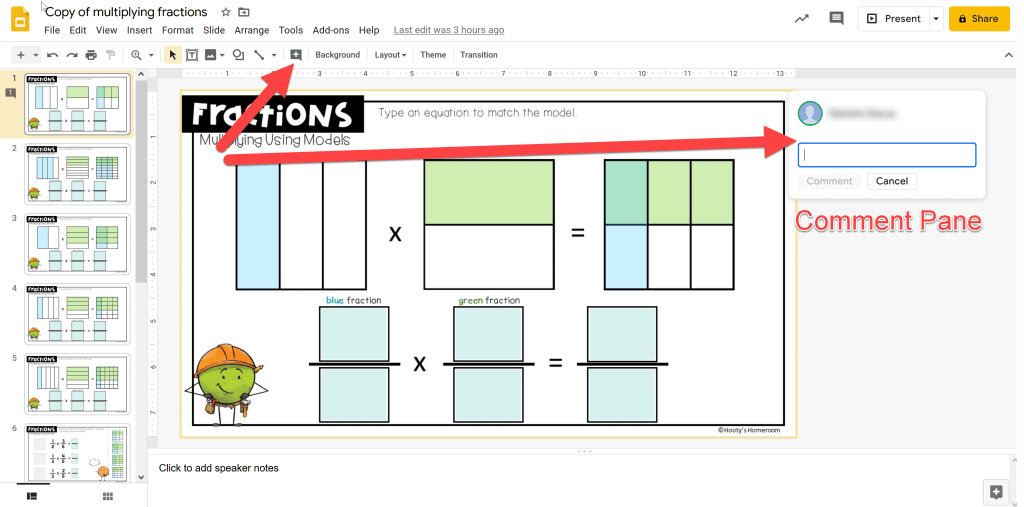
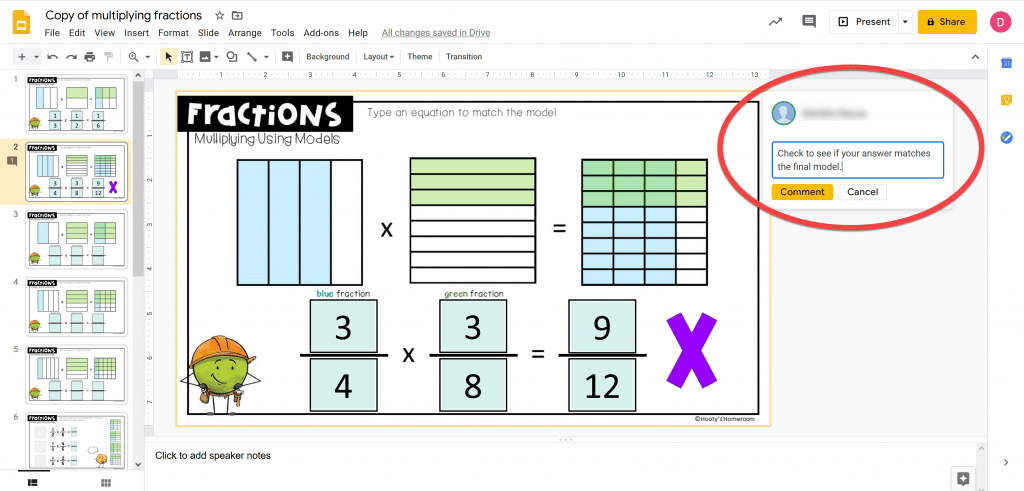
If you want to leave a comment on a slide, there are several ways to do so. You can click on the comment button and type your comment in the window that opens. Google makes it easy for teachers and students to comment back and forth through the comment pane.
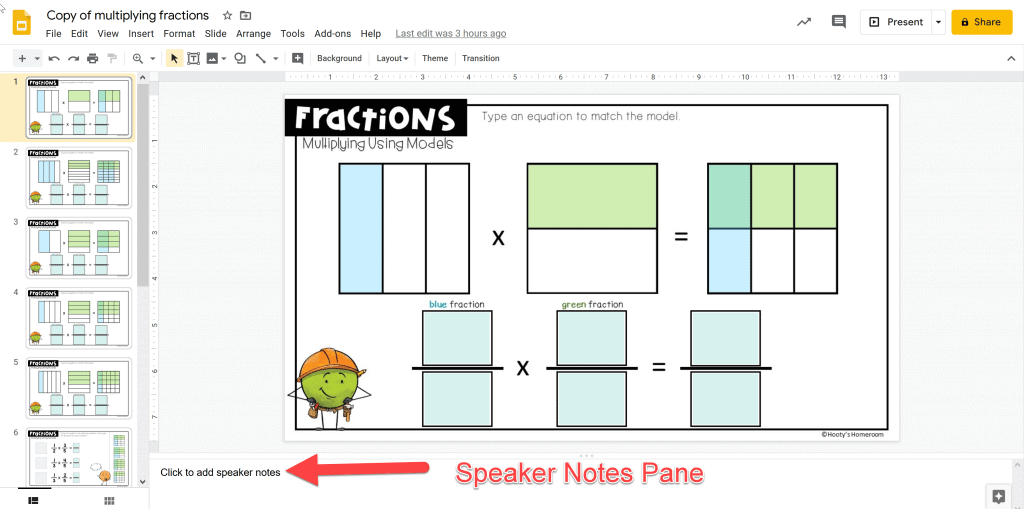
If you don’t expect a response from your student, you could also type your comment in the speaker’s notes pane. A third method would be to create a textbox on the slide and add the comment there. Whichever method you use, make sure your students know what to expect.
Save Time when Writing Comments
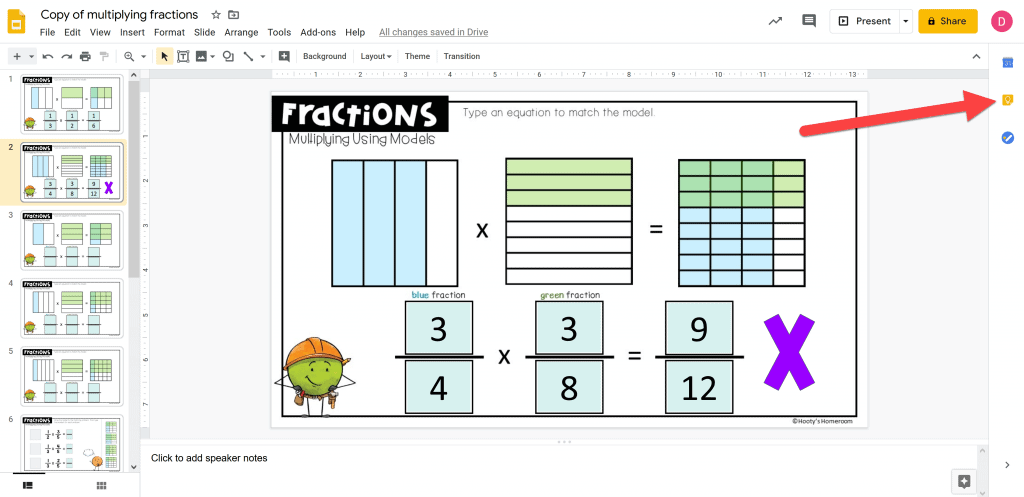
Chances are you write the same comments over and over when you are grading papers. Did you know that you can copy and paste your most used comments using Google Keep? I love this feature! To get started, click on the yellow Google Keep icon on the right side of the screen.
When the Google Keep app opens, you can click on the plus sign to create a new note or navigate to a note you have already created.
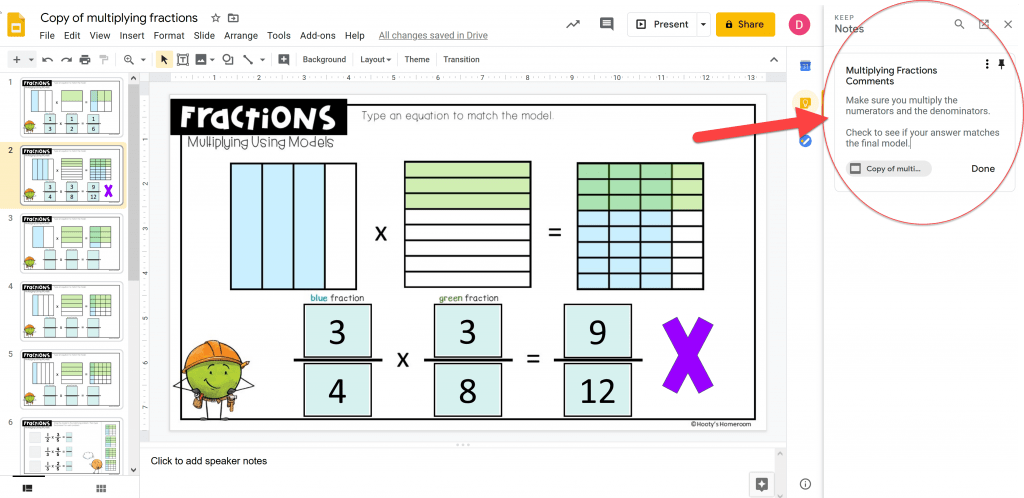
Once you have comments inside of Google Keep, all you do is copy and paste back and forth from Keep to Slides. Thank you, Google for including such a helpful feature!
Even though Google Slides activities are not auto-grading, they are quite easy to grade. Google has added features such as grid view, comments pane, and Google Keep that make the grading process simple. Now you can have your students benefit from the interactive features of Google Slides and take grades with ease. Do you have another method that works for you? Comment and let me know!


